Setting up a Debug Website
Work on the web development committee will be substantially easier with access to a copy of the website to test code on. In order to have a consistent environment, it is encouraged to use the OCF for testing. This guide will describe how to do that.
Create an OCF Account
If you have not done so, you will need to create an Open Computer Facility (OCF) account. You can do so here.
Get SSH Access
You will need to use SSH to access the OCF computers.
On Mac OSX and Linux, SSH should be accessible from a Terminal through the command ssh. To access the OCF, run
ssh [ocf username]@ssh.ocf.berkeley.edu
On Windows, you will need to download an SSH client. If you have git bash, you already have an SSH client available in the git bash terminal. Use the same command as Mac OSX/Linux. git bash is the recommended tool.
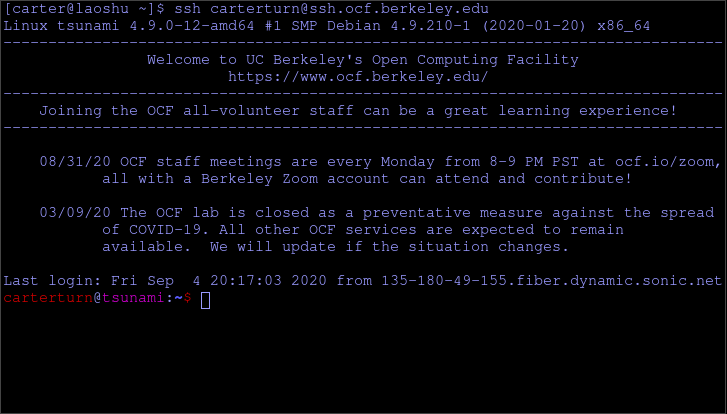
After a successful login to the OCF, you should have a Terminal window with text looking similar to:
After this point, you will have to make some use of Bash shell scripting. There are a variety of tutorials available on the internet, feel free to contact Carter for additional help.
Clone Repositories
SPS website code is stored in git. We will install the repositories to our home directory on the OCF. First, change to this directory using cd ~. Next, we need to clone both the sps_web_2020 and sps_web_sync repositories, currently stored on Github. To do this, run these commands:
git clone https://github.com/ucbsps/sps_web_2020
git clone https://github.com/ucbsps/sps_web_sync
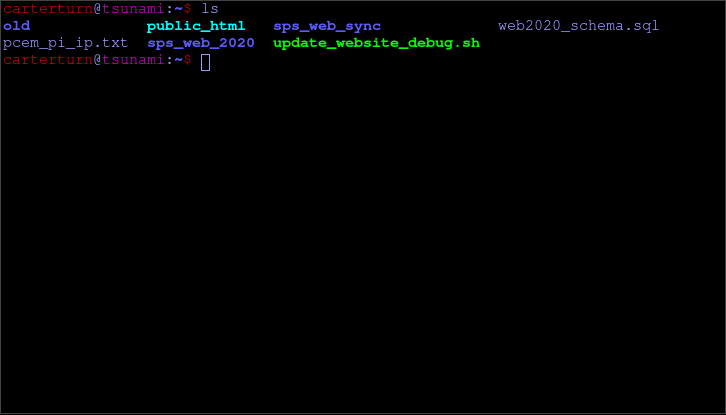
After doing this, you should run ls in your home directory. You should see folders named sps_web_2020 and sps_web_sync, similar to the screenshot below (Carter has some additional files in his home directory).
Run Setup Scripts
To run the backend of our code, we use Python. To avoid making changes to Python for your entire user account, we take advantage of Python "virtual environments". These allow us to install packages only for a separate, isolated, Python interpreter. This has been automated by the setup.sh scripts in sps_web_2020 and sps_web_sync. First, run
cd ~/sps_web_2020
./setup.sh
Then, run
cd ~/sps_web_sync
./setup.sh
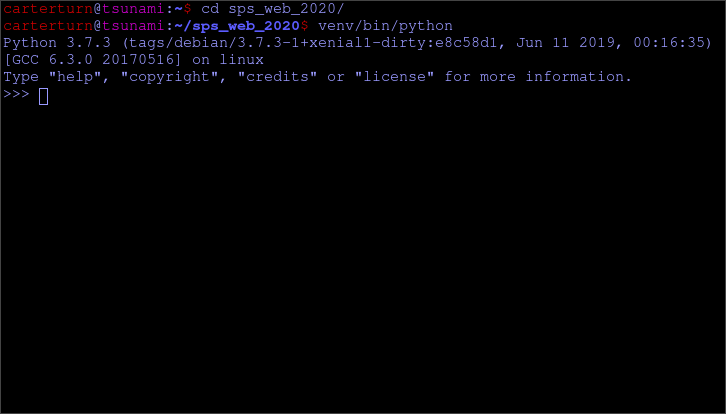
Each of these will take a few minutes. Once they are complete, the directories ~/sps_web_2020/venv and ~/sps_web_sync/venv should be created. They will contain the environment. In particular, a Python 3.7 interpreter will be setup at ~/sps_web_2020/venv/bin/python and ~/sps_web_sync/venv/bin/python. You should use these Python interpreters for running Python scripts in sps_web_2020 and sps_web_sync, the Python interpreter you get from running python will not have the necessary dependencies installed. See the screenshot below for how to start the correct Python interpreter for running code from sps_web_2020.
Create Secrets
The backend requries a secret key in order to operate securely. This key can be randomly generated. The fake_secrets.py script does this. Run cd ~/sps_web_2020 to change to the backend directory, then run venv/bin/python fake_secrets.py to generate the sps_secrets.py file.
The automatically generated sps_secrets.py file does not contain the correct credentials for accessing your mysql database running on the OCF (and it should not, as that would require knowing a password that only you should know). The password for your mysql database is not initially set. You can both set and read the password at the same time by running makemysql. Note that this command only works on the OCF computers. Remember this password, and do not share it with anyone. Once you have the password, you will have to manually edit the file. If you do not have a preferred command line text editor, nano should work well. Run the command nano sps_secrets.py to open the editor. Then change the lines as shown in the table below. [your ocf username] represents your OCF username, for example, I would write carterturn.
| Original Entry | Your New Entry | Carter's New Entry |
MARIADB_USER = 'physics' | MARIADB_USER = '[your ocf username]' | MARIADB_USER = 'carterturn' |
MARIADB_PASSWORD = 'physics' | MARIADB_PASSWORD = '[password from makemysql]' | MARIADB_PASSWORD = 'AAwvaev423fwwfasvEFagrsdf' |
MARIADB_DB = 'physics' | MARIADB_DB = '[your ocf username]' | MARIADB_DB = 'carterturn' |
MARIADB_HOST = 'localhost' | MARIADB_HOST = 'mysql' | MARIADB_HOST = 'mysql' |
Note that the password for "Carter's New Entry" in the table above is not my actual password, just an example of what could be a password. Again, never share your OCF mysql password with anyone (not even me). Finally, we need to add a bit more information that tells sps_web_sync what permissions to request from Google. To do this, add the following lines to the end of sps_secrets.py:
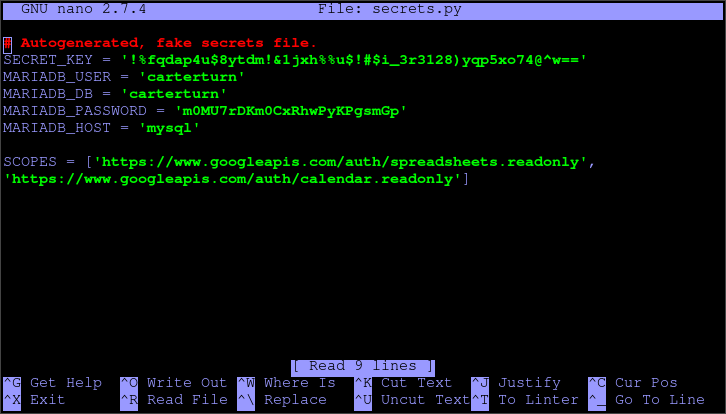
SCOPES = ['https://www.googleapis.com/auth/spreadsheets.readonly', 'https://www.googleapis.com/auth/calendar.readonly']Your final sps_secrets.py file should resemble the one shown below
Setup Database
In order for the backend to run properly, certain tables need to be created in the database. The SQL file needed to create these tables can be downloaded here (you will need permission from Carter to access this file). You will then need to transfer this file (web2020_schema.sql) to the OCF. If you are using Mac OSX, Linux, or git bash, open a terminal on your computer in the folder where you downloaded the file, then run scp web2020_schema.sql [your ocf username]@ssh.ocf.berkeley.edu:~/.
In a terminal on the OCF, change back to your home directory by running cd ~. Then, run ls. You should see the file web2020_schema.sql listed (if you do not, please tell Carter). Next, run mysql -u [your ocf username] -p -D [your ocf username] < web2020_schema.sql. When prompted, enter the mysql password you found in the previous part. This will setup the database. There should be no additional output.
Copy Files
Next, there are a few files we need to copy to tell the OCF webserver how to run your copy of the SPS website. Before we begin, change back to your home directory by running cd ~.
First, you need to copy the sps_secrets.py file from sps_web_2020 to sps_web_sync. Do this by running the command
cp ~/sps_web_2020/sps_secrets.py ~/sps_web_sync/
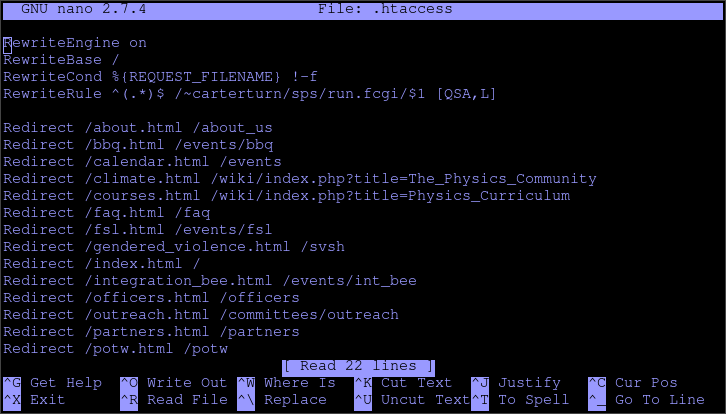
Next, you need to copy a couple of scripts into the folder read by Apache so that the webserver knows to run the backend. First, we need to make a subfolder of your OCF website that the SPS website will be installed to. Do this with the command mkdir ~/public_html/sps. Next, copy the files .htaccess and run.fcgi from sps_web_2020 to that folder by running the commands cp ~/sps_web_2020/.htaccess ~/public_html/sps/ and cp ~/sps_web_2020/run.fcgi ~/public_html/sps/.
These files also need to be edited. First, edit .htaccess (using nano ~/public_html/sps/.htaccess). Replace /run.fcgi with /~[your ocf username]/sps/run.fcgi in the fourth line (remember the ~). Your final file should resemble the one shown below (with your username replacing carterturn):
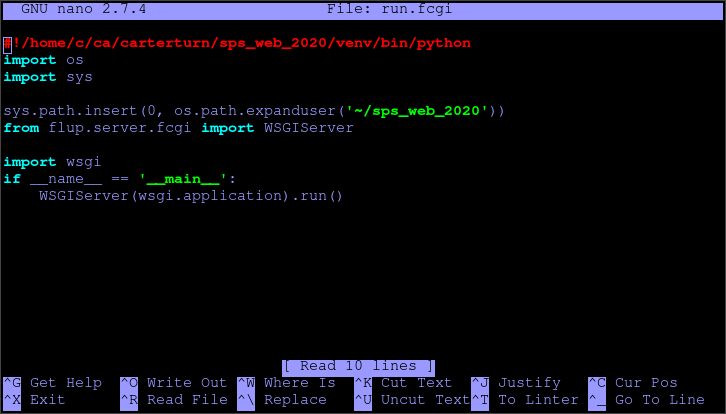
Next, edit run.fcgi, replacing /p/ph/physics with /[first letter of your ocf username]/[first two letters of your ocf username]/[your ocf username]. Your final file should resemble the one show below:
Finally, copy the script update_website_debug.sh from sps_web_2020 to your home directory by running the command cp ~/sps_web_2020/update_website_debug.sh ~/. This script is used to copy static files from the git repository to where Apache can see them, as well as tell Apache to reload the backend code. Run this script by running ~/update_website_debug.sh.
View the Website!
Your copy of the website should now be properly installed! View it by visiting https://ocf.berkeley.edu/~[your ocf username]/sps.
Sync With Google Drive
There will still be a couple of things missing. The events will all be blank, and the problem of the week page may have an error (or be blank). To resolve this, you need to sync data from Google to your copy of the website. First, you will need to copy the credentials.json file to the OCF. Download the file here. Then, run scp credentials.json [your ocf username]@ssh.ocf.berkeley.edu:~/sps_web_sync/ on your computer (or use WinSCP) to copy it to your sps_web_sync folder on the OCF. Then, run venv/bin/python download_calendar.py. This should print out a URL. Copy this URL to a web browser. It will ask you to authenticate a program to access your Google calendar and Google drive files. You should probably read the source code of download_calendar.py and download_potw.py to verify that they will not misuse this access (if you decide you do not trust them, we can setup another Google account that you can use instead of your own). Once you are satisfied, click Allow, then copy the key that it gives you back to the script and press enter to continue. The script will then download the SPS calendar. Next, download the problem of the week data by running venv/bin/python download_potw.py.
Your copy of the website should now be fully operational!
Using the Debug Website
Once you have the debug website setup, you will still have to interact with it in order to test new code you right. All these commands should be run on the OCF computer.
First, setup your copy of the website to use the branch you are working on. Run cd ~/sps_web_2020 to change to the sps_web_2020 folder. Update your copy of the website from Github by running git pull. If you wrote the code elsewhere, checkout the branch with git checkout [branch name]. Then run git pull to download the latest version. If you are writing the code on the OCF computer, first switch to dev-stable by running git checkout dev-stable, then create a new branch from there by running git checkout -b [new branch name]. Remember to use git pull and git push to keep copies of the code in sync between various computers.
Files are located on the OCF computer will not be immediately transferred to your copy of the website running there. The script update_website_debug.sh, when run from your home directory, will take care of this. You can run if with ~/update_website_debug.sh. It will take about a minute for Apache to update, so wait a bit for changes to appear at https://ocf.berkeley.edu/~[your ocf username]/sps. By default, most web browsers will cache (store a copy of) css files. In order to trigger a reload of those, press Ctrl+Shift+R in the web browser (possibly Cmd+Shift+R for Mac OSX).
There is a good chance you will get an error occasionally. Any errors (or print statements) then get written to /opt/httpd/error.log (which you can view with the command cat /opt/httpd/error.log). Unfortunately, the log file contains all errors from every website running on the OCF, so it can be a bit of a guess as to which one is from your site. The command fgrep "[string] /opt/httpd/error.log" will search the logfile for lines containing [string]. For a more powerful search tool, you can use grep, which supports regular expressions.
Some website updates will require new Python packages to be installed in the sps_web_2020 virtual environment. To do this, run cd ~/sps_web_2020 to change to the directory, then run venv/bin/pip3 install [package name]. Most packages should be automatically installed by setup.sh. You can not run setup.sh multiple times; there will be a conflict due to the virtual environment already being created. To see what packages you already have installed, run venv/bin/pip3 list. The packages required for sps_web_2020 as of September 19th, 2020 are
- django
- flup6
- pymysql
- DBUtils
The packages required for sps_web_2020 as of September 19th, 2020 are
- pymysql
- google-api-python-client
- google-auth-httplib2
- google-auth-oauthlib
If venv/bin/pip3 prints a message recommending running a command to upgrade it, you should run that command when convenient.
It will be occasionally necessary to manually run SQL commands to handle new database interactions. These will be discussed on a case by case basis.
